Wednesday, August 31, 2016

Time For Some Fun!

For those of you who work a full-time job outside the home, you might refer to Wednesday as "hump day".  You know, that day right smack dab in the middle of your week that's like a hump you have to get over to start making your way to Friday?  Well, at Word Art Wednesday we consider Wednesday a great time for some fun!  Today starts a brand new challenge, and this time we're sponsored by Simon Says Stamp, and someone will win a $25 gift certificate to their store to spend however they choose!  I hope that YOU will stop by and play along with us.  You can't win if you don't enter.
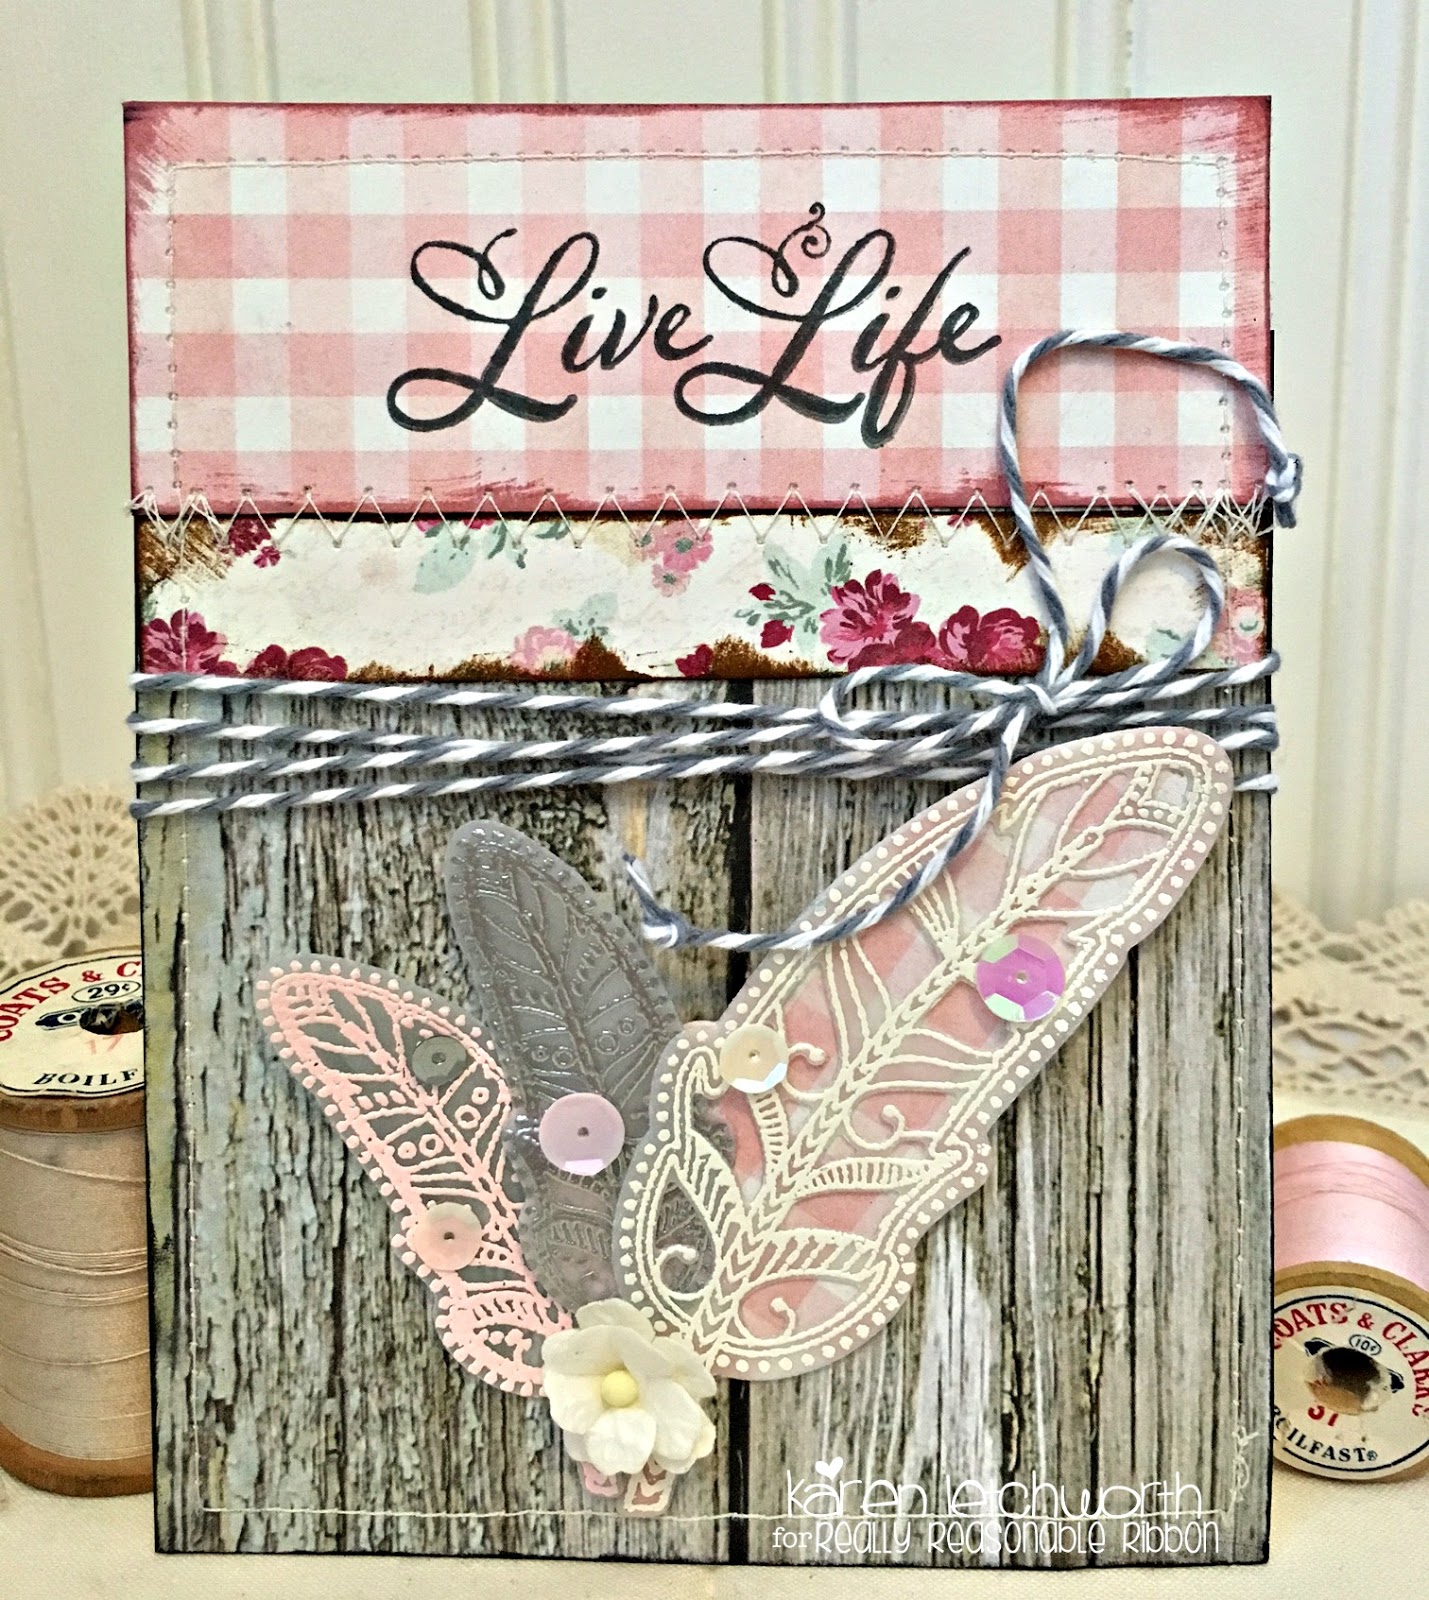
I made my card by printing this week's free word art/scripture file onto a piece of Crate Paper/Maggie Holmes patterned paper and piecing it together with another piece of patterned paper (from the same collection).  I ran a width of hot pink seam binding across my card, and tied a bow with that, medium pink seam binding and teal baker's twine.  I placed a small teal button in the center of the bow that's tied with solid pink baker's twine.  I added a half of a white doily and a small ephemera tag to my card to give it bit more layering and personality.  I also inked the edges of my card with Lucky Clover and Pink Lipstick Tim Holtz Distress Inks.
I really hope to see each of you entering our challenge at Word Art Wednesday.  It makes me SO happy to see all the beautiful entries for each challenge.  And as I mentioned, YOU could be the lucky winner of a $25 gift certificate to Simon Says Stamp.  Having them as our primary sponsor was a long-time dream of mine for many years, and I am so happy to announce that 2017 will be our second year having Simon Says Stamp as the primary sponsor of our challenges.  This little challenge blog (Word Art Wednesday)  has come a long way since I first started, and I praise God for each blessing along the way.  He is just SO very good to us.  My cup runneth over!

Karen

I'm linking my scripture card in these SUPER FUN challenges.  I try to enter every time Darnell runs this fun NBUS challenge, and I sure appreciate her endeavors for us all in the crafting community.
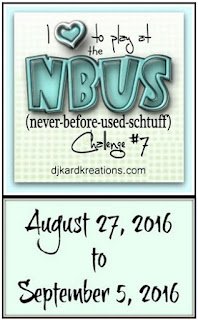
NBUS Challenge #7 - Darnell's FUN challenge is open to everyone!  Come, play along.  And thanks, Darnell!

Simon Says Stamp - Wednesday Challenge - Simon Says "Anything Goes"

Tuesday, August 30, 2016

Thanks a Bunch

Hi there, everyone!  Today's post is for Really Reasonable Ribbon, and I'd like to share a thought with you all......If you're anything like me, you've probably learned over the years that you can never have enough thank you cards on hand.  There are so many times when someone does something nice where you just want to give them a card to express your gratefulness.  However, if you keep thinking about it; your apt to forget to actually send that thank you card.  So for that very reason, I like to have plenty of them on hand.  And with all the fabulous ribbons, trims and decorative flowers available at Really Reasonable Ribbon; you can always be stocked up on the perfect accessories to get them ready to go.
This card was created using some Crate Paper patterned paper, machine stitching, Tim Holtz Spun Sugar Distress Ink, a white doily, a Crate Paper chipboard bird and journalling sticker, and a Melissa Frances rub-on.  I tied a length of Peach Baker's Twine around the card twice and tied a bow with it.  This pretty peach color is so soft and subtle....GORGEOUS!  The finishing touch were all the lovely Mulberry Flowers I used to frame the image.  I used several of each of these Sweetheart Blossoms:  Wild Orchid Craft Miniature Sweetheart Blossoms in Ivory. Two-Toned Peach, Ivory, and the lightest shade of pink from the Pink & White Mixed Assortment.  I also tucked in a couple of the Wild Orchid Craft 30 mm Mulberry Paper Leaves, and of course I used lots of Scor-Tape to adhere everything.
If you need to make some thank you cards; or, well really ANY cards (birthday, anniversary, sympathy, etc.) you will definitely want to stock up on some ribbons, trims, flowers and all the great products available in the Really Reasonable Ribbon store.  We'd also love to have you stop by to play along in the CURRENT CHALLENGE taking place now on the Really Reasonable Ribbon Blog.  We love seeing your ribbony creations.

Have a wonderful week!
Karen

Sunday, August 28, 2016

Shakin' It Up With Color

Well, I've done it again!  I've found a way to incorporate some of my most favorite things with a technique I enjoy using on my cards.  I had another chance to use these sweet Emma's Shoppe patterned papers, chipboard pieces, brads, stickers, borders, journalling spot, etc. from Crate Paper and use them on a card with another shaker element.
This shaker element was created by taking a piece of vellum that I cut and folded over to size, added lots of colorful sequins in between, and then machine stitched shut.  You can see the bright colors peeking through the vellum, which really reminded me of this fabulous inspiration photo from Verve.  I used a Verve stamp for my (Happy Birthday) sentiment.
I have been in love with all the sweet little elements from Emma's Shoppe from the very first day I saw it (when it was first released several years ago).  I found all that I could, and I always LOVE using it (even though I'm at risk of running out at some point).  It's just too cute not to use.  The stamped sentiment looks just perfect stamped in Tim Holtz Black Soot Distress Ink on the journalling spot.
I also added a (9) sticker at the top, and a chipboard letter A because I plan to send this sweet card to my precious niece, Alexa, who just turned 9.  I know this is one she will tuck inside her keepsake box and save.  I just love sending my nieces and nephews sweet cards, trinkets, and keepsakes.  I never want them to forget how very much I love them and how often I am thinking of them.  They're all just SO sweet.
Here is where I'm sharing my card:

Verve Stamps:  August Photo Inspiration Challenge - Verve's gorgeous challenge inspiration photo (posted above) game me great inspiration.  I loved how the sun was shining against these gorgeous colors almost like a dream catcher.  My patchwork patterned paper background and the sequins hidden and stitched in behind vellum helped me capture that same vibe.  I incorporated the colors, and used a sweet Verve (Happy Birthday) stamp for my sentiment.

Paper Sweeties - August Color/Photo Inspiration - I didn't use any company products on this entry, but I felt that the colors and vibe were appropriate.

Little Scrap Pieces - I love playing along in Karen's challenges, and my favorite prize is always her SUPER SWEET hand-made seam binding.  The twist this week is that you can choose her seam binding or a $5 gift certificate to ScrapPal if you win.

Cupcake Inspirations Challenge Blog - Challenge #373 - Sweet Inside - I was inspired by the color pink, and....the theme which is "sweet inside" because I made the vellum shaker box (machine stitched it together) and the "sweet inside" element are all the sweet sequins sprinkled inside the packet.  They look super sweet inside, don't they?  I just LOVE this!

This evening, we are headed out to the Cracker Barrel to celebrate our son's 17th Birthday.  He's such a good boy, and has such a heart for the Lord.  I know God has great things planned for his life, and I'm so blessed to be his Mama.  I feel so very grateful that we get the joy of having him in our lives every day.  He sure brings a great energy, excitement, humor and joy to our days.  I'm so wishing we could hit the "rewind" button.  Where do the years go?  Thanks again for visiting.

I hope you're having a blessed and relaxing weekend,
Karen

Saturday, August 27, 2016

Shake It Up, Shake It Up!

One of my most favorite cards of all to create is a good old Shaker Card; and one of most favorite companies' papers to create with is Crate Paper. So, when I was able to create a card using Crate Paper's sweet Emma's Shoppe patterned papers, chipboard and stickers along with some sweet sequins in my Shaker Card element, I couldn't be happier.  This was just plain FUN to create because I just LOVE to Shake It Up!
Once I had placed my patterned papers, chipboard, stickers, Shaker Card element with sequins, and had everything lookin' good, I knew I had to add a sentiment.  The one I chose for this card was the word "HELLO" which is Poppy Stamps Hip Hello Die-Cut (another one of my favorites, and it costs only $5 - a great bargain).  I cut the sentiment from a turquoise scrap of Bazzill Basics paper to coordinate with all the fun colors in my card.  This die-cut is just one of those that I've used over and over again because it's so cute.  You know....those favorite things we tend to revisit quite often.
I'm entering my card in this fun challenge:

Poppy Stamps Challenge - Challenge #23 - Shake It Up - I added a shaker element with sequins, and used Poppy Stamps Hip Hello.

Thanks so much for stopping by, and have an AWESOME weekend.
Karen 


Friday, August 26, 2016

Traveler

Hello, sweet blog friends!  I'm so glad you've stopped by again today to take a peek at this card I created today.  I found another challenge that I really wanted to enter, and so I used a sketch (as well as the theme of travel) from the My Favorite Things Blog.  It's always a lot of fun finding inspiration out in the crafting community, and that's exactly what happened this time.  LOVE  it!
This card was created using some My Minds Eye patterned paper, and I chose this particular paper because it has the Eiffel Tower printed right on it, so that set the tone for the card.  Next, I knew I wanted to include MFT product (which is a bit limited in my craft room), so I had to get creative with what I own.  I made two rolled flowers using a MFT die-cut that I cut from deep red and black.  I used the same die on both flowers; but I rolled the black one much tighter than the red, so it's considerably smaller.  I added in some black and natural burlap string, My Mind's Eye buttons to the centers of the flowers, and I inked the edges of the patterned papers.
The sentiment I used on this card (Traveler) is from Crate Paper's Journey collection.  I also have some stickers from this collection tucked in here and there, and also managed to squeeze in a ticket from Jillibean Soup ephemera.  

My Favorite Things Blog - Card Challenges:  Sketch Challenge #295 - I completely flipped this sketch upside down, and I also used the Friday Inspiration on the MFT Blog (Travel) for the theme of my card.  I had a lot of fun with it.  I used a My Favorite Things rolled flower die-cut to create the rolled wool felt flowers on my card.

Thanks for visiting me, and please know that I am very grateful for the comments you leave.  I read each one, and it makes me smile.  I feel SO blessed.  Have a great week!

Karen


Thursday, August 25, 2016

Inspired By Stamping - Second Post

Hi there, crafters!  This is my second post as a Guest Designer for Inspired By Stamping, and today I'm sharing another helpful technique and a couple of sweet cards that were created using some gorgeous stamps and coordinating dies from Inspired By Stamping.  I hope that you will love these sweet products as much as I do.
This technique is one I often use when working with stamps and die-cuts together.  It helps you line up your dies and stamps so that you always get a perfect cut and guarantee that your stamping lines up with your cut lines.
To do this, simply take your die-cut and adhere a piece of tape, securing the top side of your die onto the card stock from which you'll cut a template.  Run the die through your machine once to cut out the shape, but keep the metal attached to the paper template (even though there is empty space in the middle).  You can now stamp your image onto a piece of paper in your desired color of ink and then lay your template over the stamped image.  You will be able to line it up perfectly using the open space to see your stamped image and line it up.  Then, lay it down perfectly in place (so that you see the stamped image through the template/hole) and run it through your machine again.  You'll get a perfect cut every time.
I stamped a journalling spot from the Fancy Labels 3 Stamp Set in Tim Holtz Lucky Clover Distress Ink, and then stamped the sentiment from the Fancy Labels 3 Stamp Set using Tim Holtz Black Soot Distress Ink inside the journalling spot's center.  Then, as explained above, I cut a template for the journalling spot using the coordinating Fancy Labels 3 Die.  I attached some Crochet Trim and flowers as an accent. Inspired By Stamping has everything you need to make one for yourself.
Above you will see all the supplies I gathered to make my second card.  Inspired by Stamping has SO MANY great stamp sets.  You really need to visit the store to see them all!
My second card uses the same technique but was created with another stamp and die from the same sets.  I also used some of the sweet patterned papers from the Vintage Floral 6x6 Patterned Papers Pad as well as some Crochet Trim Collection II.  Inspired By Stamping has so many wonderful products that will help you make lovely cards like these.
Thanks so much for visiting today, and be sure to stop by the Inspired By Stamping Blog again soon for more inspiration using Inspired By Stamping products.  Please let us know if you have any questions about the products used on these cards.

Have a blessed day,
Karen

Wednesday, August 24, 2016

An "Emptier" Nest

Hello, sweet blog friends!  As many of you know, our oldest daughter got married this past weekend.  All our company has finally departed, including our youngest daughter and her husband who were staying with us over the wedding weekend.  It was the last time I'll ever have had them all under one roof for a VERY long time (if ever).  It was a very bitter-sweet experience, for sure.  Two down, and one (our 17-year-old baby boy) left in our home.  I wish this time could last forever.  We have the best kids a person could ever ask for, and we would have gladly let them all live with us forever.  But we know when it's time to let go and trust them to God (and to their spouses as it should be).  It just always seems to take a few moments for everything to hit you, and to then make the necessary adjustments to find your new normal.  It sure is hard walking past (now two) empty bedrooms.  That never seems quite right.  Perhaps we need to do something with all of these extra empty bedrooms.   But for now.....memories fill our house and our hearts.
I was so glad (now that all our guests have gone home) to finally have some time to get into my craft room and work on a few things; both for my Design Team commitments as well as just for fun.  There were a few challenges where I knew I really wanted to try to play along this week/month and now I have a card that I can enter in these challenges.
I used a wide variety of products on this card.  It started with a few different October Afternoon patterned papers and an October Afternoon music flair (pin).   The stitched heart is from Papertrey Ink (also cut from OA paper), and I stitched it with pink DMC floss.  I tied a bow with Frosting Seam Binding, Teal Baker's Twine, and I implemented the color green by adding two hand-stamped leaves that are from Paper Sweeties Make Today Beautiful (Retired) stamp set.  I hand-cut them and added them to the bow.  The stamped sentiment is from Inspired By Stamping.  I also used the coordinating Fancy Labels 3 Die-Cuts to compliment their Petite Banners Stamp Set.  I really enjoyed Guest Designing for them this month.
Here are the challenges where I'm sharing this sweet card:

Paper Sweeties August Challenge - Color/Photo Inspiration - I used a couple of Paper Sweeties products on my card (details above).  This colors and layers in this sweet photo really inspired me, and I had a lot of fun pulling out my Paper Sweeties products again.
DL ART August Linky Party - I always enjoy playing along here when I can.  I always enjoy getting the sweet comments left by Diana and her talented Design Team.  I hope everyone will stop by and play along here.

Little Scrap Pieces - Saturday Linky Party

Paper Minutes #449 - Sewing - Stop by this sweet challenge blog for some lovely inspiration by their talented designers.  I almost always LOVE to machine stitch on my cards, so I knew I just HAD to enter this sweet challenge.

Tuesday Throwdown Challenge Blog:  TT#308 - Make It Sparkle - I added some white and some clear sparkly sequins to embellish my card and make it sparkle.

Thanks so much for stopping by my blog today.  I'm always so grateful for your visits and I always appreciate the sweet comments you leave for me.  Have a wonderful and creative week, my sweet blog land friends.  Can't wait to see what ya'all have been creating.  You all inspire me so much.

Have A Sweet Day,
Karen


Monday, August 22, 2016

Terrific Twine from RRR

Hi there, everyone.  As you may know, there are many terrific trims at Really Reasonable Ribbon, but for today; I want to just focus on one very simple trim that everyone needs in LOTS of great colors......TWINE!  Really Reasonable Ribbon carries 40 colors of Baker's Twine and an additional 15 colors of Burlap String.  These amazing trims cost no more than ten cents ($0.10) per yard.  So, not only are they colorful, versatile and super useful; but they're also SUPER affordable!
Today I'm sharing three sweet cards that really showcase some of these wonderful twines.  My first card uses Oyster Gray Baker's Twine that I tied around the card several times and tied into a bow.  I also added a sweet little Ivory Sweetheart Blossom to the bottom of my card.
My second card has a long length of Red Burlap String wrapped several times around it.  You can see how adding this one simple trim to your cards adds so much texture to your project; not to mention that perfect pop of color.  And again, with SO many great colors; you can always find the perfect shade for any project. Another great product is Scor-Tape, and I use it to attach everything!
I hope that you'll take time to stop by the Really Reasonable Ribbon store to see all the wonderful twines they carry, as well as all the great flowers in the Mulberry Flowers section.  You're sure to find something new for your crafting, and the prices are amazing (as well as super reasonable shipping).  We also have a fun challenge on the Really Reasonable Ribbon Blog where we'd love to have you play along and share your creations.
My third and final card (my personal favorite) was created using some October Afternoon patterned papers, a PTI heart die-cut that's stitched with DMC floss, a button, sequins, a stamped sentiment from Inspired By Stamping, a tiny tag held with a rusty pear-shaped pin, and more fabulous twine.
This card uses both the Cotton Candy Baker's Twine and the Teal Baker's Twine.  Once again, you can see how Really Reasonable Ribbon has the PERFECT COLORS to match any project you're working on and make it truly special.  It's really the quint-essential trim that every crafter needs in a variety of colors, and Really Reasonable Ribbon can help you stock up at a great price.  This card also uses a stamped sentiment from Inspired By Stamping, a PTI stitched heart die, some sequins, and a few other goodies.
There's always a fun challenge taking place on the Really Reasonable Ribbon Blog, and we would love to have you play along with us.  And don't forget to check out ALL the fabulous twines, trims and lovely goodies carried in the Really Reasonable Ribbon shop.

Thanks for stopping by, and have a sweet day!
Karen

I'm sharing my cards here:


Simon Says Stamp Wednesday Challenge - Make For The Border - Each of my cards has some type of border.  The first has a patterned paper border with twine, the second card has a decorative border, and the third card has a fancy ribbon border.

Simply Create Too Challenge Blog - Challenge #116 - Use Feathers - You will see that my first card (at the top of the page) uses a sweet new feather die-cut set that I've fallen in love with.

Sunday, August 14, 2016

You're My Star

Early this morning, I stopped by the Cupcake Inspirations Challenge Blog.  I always love to see their inspiration photo and all the adorable samples made by their talented Design Team.  This week's inspiration is "Shine Bright Like a Diamond".  But as I told my blog friend and Cupcake Inspirations DT Member, Birgit, I don't own ANY diamond stamps or anything of the sort.  So I knew I would have to think WAY outside the box on this one.  I don't even have any stamps about diamonds or stars (or anything that sparkles...LOL).  SO....my sentiment is a series of Melissa Frances rub-ons that I pieced together to say "You're My Star & Inspiration".  That's the best I could do, folks!  This was their inspiration photo:
I used some super sweet Bo Bunny patterned papers that I inked and pieced together following a sketch layout from this week's challenge at Sketch Saturday (super cute).  Once I had all that laid out, I added a seam binding bow, and I made a make-shift "star" out of a Maya Road chipboard piece that I painted with acrylic paint and covered in ultra-fine glitter.  That's my "star"....LOL  I placed blue pearl accent stickers in the centers of the star and the bow.  I also added pink, white and blue sequins here and there to make it shine and sparkle even more.
It was fun taking on a challenge where I really had to challenge myself to find the elements I needed.  I love the soft blues, and all the soft sweet elements.  I hope the gals at Cupcake Inspirations can understand my interpretation of the challenge...LOL
I'm linking up in these challenges, and I know they'd all love to have everyone play along!

Cupcake Inspirations Challenge #371 - Shine Bright - See my explanation on my interpretation of this challenge in the paragraphs above.  SUPER FUN!!!

Sketch Saturday Challenge Blog - Challenge #425 - Follow the sketch, and it is SUPER cute!

Pile It On Challenge Blog - Challenge #114 - Make Your Own Background - I made this background by piecing together several sweet patterned papers.

Simon Says Stamp Wednesday Challenge - Let's Go Wild - I'm entering this card because I'm "wild" about several things here....SSS and their challenges, sequins and seam binding, and making cards for fun challenges (to name a few).  I'm wild about card-making so I'm throwing my hat in the ring so to speak.

I really am grateful to have you visit my blog, and I thank you for the sweet comments you leave for me.  Have a great week of creativity and fun.  I am grateful for every comment and every visit, and I wish you all God's richest blessings.

Karen

Saturday, August 13, 2016

Make Today Beautiful

Each day comes with its own unique set of ups and downs.  However, it will be exactly what we choose to make of it.  And with that said, even when life throws us a curve ball and things seem to be piling up against us, we need to make a conscious decision to "Make Today Beautiful".  In doing so, we will enjoy ourselves so much more, make the most of each experience, and be able to push through the difficult times.  Just make that choice to make each day a beautiful one no matter what happens.
I created this card following the sweet sketch this week over at Sketch Saturday Challenge Blog.  I just love this design, and had a lot of fun with it.P  I let my patterned papers be the star of this one, and added only a few little flower embellishments and a stamped sentiment.  The papers and embellishments are all from Crate Paper's Oh Darling line, and the teal baker's twine and darling Pastel Sweetheart Flowers are from Really Reasonable Ribbon.  Don't they match my card beautifully?   I just LOVE them.

I'm delighted to be linking my card to these challenges where I always LOVE to play along:

Sketch Saturday - Week #425 With Simon Says Stamp - This sketch is ADORABLE!!  Come by, and play along.

Pile It On Challenge Blog - Challenge #114 - Make Your Own Background - For this card, I decided to let these super sweet patterned papers be the star of the show, and I used them for my background by inking each piece.  I just LOVE the simplicity of this background choice.

Simon Says Stamp - Wednesday Challenge Blog - Simon Says "Let's Go Wild" and I am absolutely WILD about Crate Paper products; many of which are sold at Simon Says Stamp.  I went wild with these sweet products on this card.

I am truly SO grateful that you've stopped by my blog, and I want to thank you for your visit.  Your kind and encouraging comments mean so much to me, and it's my intent to return the favor by stopping by your blog as well.  I hope you have a very blessed and relaxing weekend.

Karen

It's RRR August Blog Hop Time

Hello, friends and fellow ribbon lovers.  It's the 13th of the month, and time for the monthly fun of blog hopping with Really Reasonable Ribbon to take a closer look at this month's Ribbon Club Assortment and all the other amazing ribbons, trims, twines, flowers, leaves, adhesives, bow-making supplies, and SO much more you can find in the Really Reasonable Ribbon on-line store. You should arrived here from Nancy's Blog.  If you didn't, you can get caught up quickly by popping over here to the RRR Blog and follow the links.  Here's a look at this month's Ribbon Club Assortment:
As I always do for the monthly blog hops, I've chosen to share a darling hair bow that was created using all the different ribbons in this month's collection.  There's a length of each trim including the 3/8" Shell Print on Rust Satin Ribbon, 3/8" Diamond Satin Kiwi Green, 5/8" Square Print Satin Ribbon in Tangerine, 5/8" Delicate Stitched Satin Ribbon Tuftan Brown, 3/8" Autumn Bold Diagonal Stripe Grosgrain Ribbon, 5/8" Diamond Satin Rust, 5/8" Square Print Satin Ribbon in Kiwi Green, 3/8" Checkerboard Satin Ribbon in Tangerine, 3/8" Select Swiss Dots Grosgrain Ribbon in Tuftan Brown.  Aren't they all just stunning?  They all compliment one another so nicely as all of the ribbons and trims at Really Reasonable Ribbon do.
The bow is secured using a French Clip; and what's really great about these clips is that they come in a wide variety of sizes to accommodate different sized bows.  Whether you're making a tiny bow for a baby or a bigger bow for a teenager, you can always find the perfect size for your specific needs.  Check out ALL the great Hair Bow Accessories available in the RRR Shop.
The next stop you will make on this month's Blog Hop is at the blog of my creative friend Kathy.  I just know she has something amazing to share with you all.....she's got a real way with those ribbons!  Be sure to leave comments along the way, and then answer the question on the Really Reasonable Ribbon Blog once you've completed your stops.

We're so grateful that you've joined us for this month's Blog Hop.  Really Reasonable Ribbon is THEE place for ribbons, trims, and SO much more.

Simon Says Stamp Wednesday Challenge - Let's Go Wild - Well, I'm WILD about RIBBONS!

Karen

Thursday, August 11, 2016

Guest Designing at Inspired By Stamping

Hello, everyone!  Here's some exciting news.....I'm Guest Designing this month. for Inspired By Stamping.  I absolutely LOVE creating with their sweet stamps and dies, and I hope that some of the tips I share with you will be helpful, and that you will love Inspired By Stamping's sweet stamps and dies as much I do.
The technique I 'd like to share with you all today is inking your patterned papers.  It really helps define the colors and let them stand out.  This card was created using Inspired By Stamping's lovely patterned paper pack called Spring Lilacs Paper Pad.  It is filled with gorgeous shades of lilac and purple and works beautifully with all the great stamps and dies carried in the store.
Once I cut all my pieces of patterned paper, I inked each one Tim Holtz Dusty Concord Distress Ink.  I even inked the small tags made from vintage sheet music and more of the patterned paper from the Spring Lilacs Paper Pad.  You can really see how inking the edges of your cards allows the colors to stand out.  Once I had cut and inked all my papers, I machine stitched them together.  Then, I added a length of Crochet Trim and attached it to my card.  I also ran a long length of lilac baker's twine around my card.  For the sentiment, I used the lovely Big Hope Stamp Set and stamped the words in Tim Holtz Black Soot Distress Ink.
My next card uses the same lovely Spring Lilacs Paper Pad, lots of paper flowers, leaves and twine, and the sentiment was stamped using Inspired By Stamping's sweet Wishing You Stamp Set.  This lovely set says "wishing you" with several options to accommodate various occasions when you might need a card.  It's a great set to own.
You may also see that I tucked a snippet of Crochet Trim into the flowers, and added a stick pin, ivory burlap string, and a pearl swirl accent sticker as well as a bit of machine stitching and, of course, inking on the edges of my patterned papers.
We hope that you will stop by again soon for more inspiration using the fabulous stamps, dies, papers and trims from Inspired By Stamping.  They also have fun challenges, lots of great inspiration on their blog, and we hope that this has inspired you to treat yourself to something new from Inspired By Stamping.  Just wait until you see all their GORGEOUS stamps!

Thanks for stopping by,
Karen


Wednesday, August 10, 2016

Happy Anniversary

Welcome to to my blog, everyone! Today I'm sharing an anniversary card I created using lots of great ribbons and trims from Really Reasonable Ribbon.  I just LOVE all the fabulous trims they carry, and SO enjoy how they can spice up your cards, scrapbook pages, and other crafting projects.
This card was created using some Crate Paper patterned papers that I layered and machine stitched together.  I also cut some half circles from the patterned paper to create the border at the bottom.  Then, I made that border POP by adding a width of Pink Chevron Striped Twill by running it through a buckle slide (and, by the way, we carry this sweet Chevron Twill in 11 fabulous colors).  Next, I tucked a snippet of the Pink Chevron Striped TwillNoble Peacock Seam Binding, and Debra Natural Crochet Lace just above the buckle.
And finally, I added a chipboard piece with a Happy Anniversary rub-on and placed it top, front and center.  I know, it's hard to take your eyes off those gorgeous ribbons, right?  But every card needs a sentiment.  LOL

Thanks so much for stopping by.  Don't forget about the FUN CHALLENGE taking place on the Really Reasonable Ribbon Blog.  We love to see your wonderful cards and projects.  I hope you have an awesome day!

Thanks for stopping by,
Karen

So Proud Of You

Since my sweet sister, Audra, passed away almost two years ago now; I try very hard to keep her precious little babies in the forefront of my thoughts.  Because they are still so young, and missing the presence of their mother (the one person who takes care of EVERYTHING) I try to stay on top of sending them little reminders of how much their efforts in school mean (among so many other things).  Because Audra (Mom) isn't there, they still need a cheerleader.  You know, that one person (usually our Mom) who tells us how great we are, how we can accomplish anything, how we're always on their side and always there for them - that one person who makes us feel good about ourselves when we're little.  They don't have that, and I know it's super important to send them constant reminders of those little things that tend to fall through the cracks when Mom isn't around.  Just being there to tuck them in at night and say their prayers with them is something I SO wish I could every night; as Audra would.  These are the things that break my heart just a little each day, and why it's just SO very hard to move on without her. That constant reminder that Audra's presence is so greatly missed in their daily lives, and no matter how hard I try; I can never fill that void for them.  That cuts SO deep.
So I made this card for Tomas, the oldest of her children.  He had a rough school year last year, failed a class, and had to take summer school to make up the course.  But he did it, and he's back on track.  Ready for the new school year and all caught up to everyone else. I hope that this experience taught him to focus and keep his eye on the prize.  But I know it's hard without that extra help, and so much sadness hidden deep inside.  I'm trying to encourage him, believe me.  Every kid needs their Mom, and it's just SO sad without her there.
I used kraft card stock, a patterned paper, and then cut the lattice die-cut background again from kraft card stock.  I inked everything with walnut ink.  Once I had that hand-made background in place, I added some ruler ribbon, a wooden ruler that I tea stained, some red baker's twine, and a stamped sentiment on kraft card stock, backed with Jenni Bowlin patterned paper.  That's about it.

I will be sharing my card in a few challenges.  I specifically made my own background for the Pile It On Challenge.

Pile It On Challenge Blog - Challenge #114 - Make Your Own Background - I created my background by cutting a lattice design using a die-cut.  I attached it to my base and inked it to make in look grungy.  It gave me a nice hand-made background for my card.


Scrapy Land Challenge Blog - Challenge #47 - Anything Goes - I used a large lattice background die-cut from Frantic Stamper to create the sweet background.  I inked the lattice background to give it a grungy look.

Thanks so much for stopping by to say hello, everyone.  I'm grateful beyond words, and really hope you will visit again soon.

Karen

Monday, August 8, 2016

Creating My Own Background

As I've admitted to many of my friends in the blogging and crafting community, I am a creature of habit who tends to create within her safe little box (my "comfort zone"), and I rarely ever take on trying something new or learning a new technique.  However, I did go out on a limb, and I ordered some Heavy Gesso by Prima and some cute little stencils.  I wanted to try my hand at a technique I had seen here on Melissa Phillips' Blog.  First, I stamped some PTI Background Basics words onto a piece of Watercolor Paper using Hickory Smoke Tim Holtz Distress Ink.  Then, I laid the PTI stencil across my stamped paper and spread a layer of the white Heavy Gesso across the paper/stencil.  You carefully peel up the stencil and let your gesso dry.   Once it dried completely, I had my hand-made background (which is the theme/requirement for this week's challenge at Pile It On Challenge Blog.
I added my sentiment using a new technique called Sentiment Strip Grounding which I learned on the Papertrey Ink Blog today.  I used a scrap of Crate Paper patterned paper which I inked to lay my strip, then I added a PTI (YOU) die-cut,  and a PTI stamped sentiment (sweet you), and a small piece of vintage tape.
For the "image" that I added to my Sentiment Strip, I cut a heart from a Papertrey Ink Stitched Heart die, and stitched it with ivory DMC floss.  I added a baker's twine bow and a tiny black button with mint baker's time in its center.  I also took a close-up of my card that allows you to really see the texture that Gesso gave my hand-made background.  It was really fun to create, and it's good to learn new things!
These are the challenges where I'm entering this card:

Pile It On Challenge Blog - Challenge #114 - Make Your Owhn Backgrounds    As I explained in detail above, I created this background by hand-stamping a piece of watercolor paper, and then layering it with  heavy white gesso using a floral stencil.  Once it dried, there was my hand-made background piece.

Nicole Heady's Papertrey Ink Blog - Make It Monday Challenge # 257 - Sentiment Strip Grounding - I used a piece of scrap paper to create my sentiment strip.  I added a Papertrey Ink "YOU" die-cut and a Papertrey Ink stamped sentiment using the Wonderful Words Stamp Set (sweet you), and I used a Papertrey Ink Stitched Heart Die, and a Papertrey Ink Woodblock Stencil Set to make my gesso background (learned from Melissa Phillips blog). 

Simon Says Stamp Wednesday Challenge Blog - Simon Says "Fabulous Florals" - I used a floral stencil to add a floral background over the stamping using Heavy White Gesso.  There's a photo that shows you a close-up of this fun technique and the sweet floral texture it gave my card.

Thanks so much for visiting!
Karen